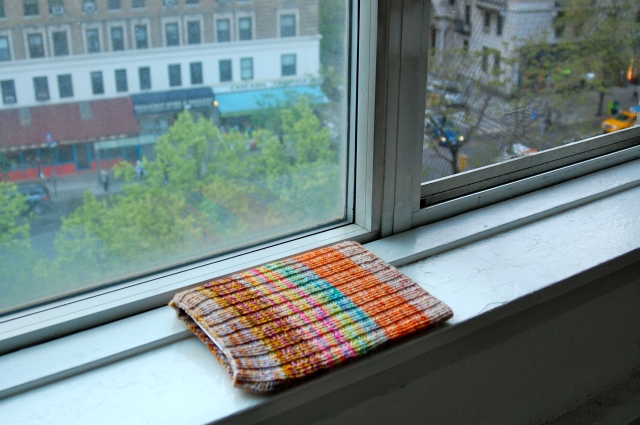
iPad 3 Sock Pattern

About this pattern: One of the most exciting things about getting new electronics is thinking up a way to wrap them in delicious, squishy knitting. This very simple iPad 3 “sock” is snug, squishy, and soft – and easily knit in a couple days! This is a great small project that lets you play with color, since it’s all knit with sock yarn scraps.

Difficulty: Advanced beginner. Pattern requires: knitting, purling, joining in the round, Russian join and Kitchener stitch.

Needles: Size 6 (or size needed to obtain gauge)

Yarn: Sock yarn scraps or mini skeins. Don’t have any? Try asking your friends who are sock knitters or try joining a group on ravelry.com that hosts mini skein swaps! Another option is to search for mini skeins on etsy.com! I used just under 60g of various sock yarns, including (but not limited to) Socks That Rock Lightweight, Nooch Fiber Superwash Sock, Koigu KPPPM, and my own handspun. The idea is to have fun with different color combinations. Note: It does NOT matter if you have different amounts of each scrap!

Gauge: HOLDING YARN DOUBLE, 1”= 4 stitches across, 8 stitches down in stockinette stitch in the round. The gauge across is more important than the gauge down. I realize that the scraps you’re using might be slightly different weights – don’t worry if you don’t get the gauge quite right – there will be a check to make sure that the sock fits before you put too much time into it.

Pattern:

Note: The entire pattern is worked holding the yarn double.

Holding yarn from your first two scraps double, cast on 54 stitches.

Join in the round, making sure not to twist stitches. I used magic loop, but you can use whichever circular knitting method you prefer.

Row 1: *k2, p1* x18

Repeat this row until the work measures 1”.

VERY IMPORTANT STEP: Before you go any further, try slipping your work onto the iPad. The cast on edge should be tight and should look very small, but should still be able to be slipped on. If you don’t have an iPad, make a cardboard cut out to ensure that it will fit – the iPad is about 7.25” wide. If it doesn’t work, you need to start over with a larger needle. Always use the smallest possible needle to obtain gauge, as you want the sock to be as snug as possible.

Continue working in the ribbed pattern. Whenever one scrap of yarn ends, use the Russian join method to connect it to the next scrap (http://www.knittinganyway.com/freethings/russianjoin.htm). If you do not like this method, you can tie a small knot between the two yarns and weave in the ends when you complete the project.

Continue knitting until the work measures 11”. This is longer than the iPad, but the sock will become shorter when it is stretched over the iPad. Use Kitchener stitch (http://knitty.com/ISSUEsummer04/FEATtheresasum04.html) to bind off all stitches – this bind off should join both sides of the “sock” and create its base.

Weave in any ends.

Enjoy!

Twice-Around Circular Scarf

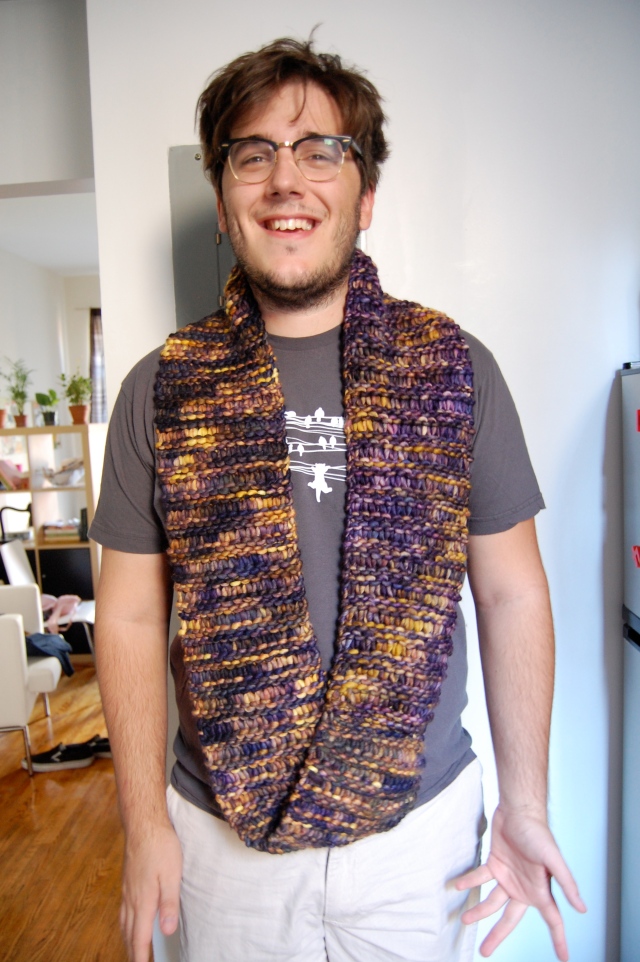
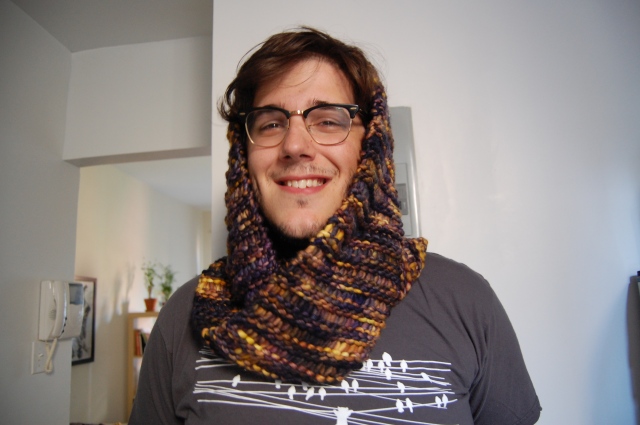
About this pattern: This is a (very!) quick to knit circular scarf that is knit flat then seamed together.  Because it’s made with very bulky yarn, it’s good for gift knitting, especially if the gift-ee lives somewhere cold.  It can be worn three ways – wrapped once around the neck, wrapped twice around the neck, or wrapped twice covering the ears.  See below for other pictures!

Difficulty: Very easy and quick.

Size: About 5 feet long before joining – long enough to wrap twice around the neck.

Needles: size 13.

Yarn: Malabrigo Yarn Rasta (color: Soriano), 2 hanks (about 180 yards) or a super bulky yarn of your choice.

Gauge: 1″ = 2 stitches across, 3 stitches down in garter stitch.

Pattern:

Cast on 15.

Row 1: Knit all stitches.

Row 2: Knit all stitches.

Row 3: *K1, YO* repeat until last stitch, K1.

Row 4: *K1, drop the YO stitch* repeat until last stitch, K1.

Repeat rows 1-4 until the work measures about 5 feet.

End pattern on Row 2.  Bind off loosely, and use the tail to weave the two ends of the work together, creating a circle.  You may choose to twist the work beforehand – the scarf in the picture has been twisted once prior to connecting.

Weave in ends.

Additional photos:

YELLER – Scarf

About this pattern: I first decided I wanted to make a yellow scarf with a fringe when I saw a rendition of the “Florence Scarves” on ravelry.com that has a nice beachy look to it.  I really wanted the fringe-iness to be reflected throughout, so I designed a pattern based around fringe-like delicate dropped stitch stripes alternated with a more substantial stripe.  The inspiration for the diamonds in the more solid stripes came from some Navajo blankets I have been looking at.  Of the three hanks of yarn required for this scarf, one is entirely used for fringe – I really like the full effect it gave, but you can experiment with more or less if you want to change the look a little.

Difficulty: moderate.  Pattern requires knitting through the back loop.

Size: 6 feet with fringe, 5 feet without.

Needles: size 5.  I prefer to use circulars because the scarf can really grow horizontally on the needles when you’re wrapping the yarn for the dropped stitches, but longer straight needles should work as well.

Yarn: Alchemy Juniper (color: Michelle’s Marigold) 3 hanks (about 700 yards) OR 700 yards of a fingering weight yarn of your choice.

Gauge: 1″ = 7 stitches across and 6 stitches down in garter stitch.

Key:

K = knit

P = purl

K2tog = knit 2 stitches together

SSK = slip slip knit

KTBL = knit through the back loop

YO = yarn over

W2 = wrap yarn around needle twice

W6 = wrap yarn around needle 6 times

DW = drop wrapped stitches

Pattern:

Cast on 58 stitches loosely.

**Preparation for the fringe – you may choose to skip this if you do not want to put a fringe on this scarf**

Row 1: K all stitches

Row 2: *K1, YO, K2tog* rep until last stitch, K1

Rows 3 and 4: K all stitches

You should now have 19 small holes in your work, which will be used for the fringe later.

**Begin scarf pattern**

DROPPED STITCH STRIPE:

Row 1: *K1, W2* rep until last stitch, K1

Row 2: *K1, DW* rep until last stitch, K1

Rows 3 and 4: K all stitches

Row 5: *K1, W6* rep until last stitch, K1

Row 6: *K1, DW* rep until last stitch, K1

Rows 7 and 8: K all stitches

Row 9: *K1, W2* rep until last stitch, K1

Row 10: *K1, DW* rep until last stitch, K1

Rows 11 and 12: K all stitches

NAVAJO DIAMOND STRIPE:

Row 1: K4, [K4, K2tog, YO, K2, YO, SSK, K4], K4, [repeat bracket pattern], K4, [repeat bracket pattern], K4

Row 2: K all stitches

Row 3: K4, [K3, K2tog, YO, K4, YO, SSK, K3], K4, [repeat bracket pattern], K4, [repeat bracket pattern], K4

Row 4: K all stitches

Row 5: K4, [K2, K2tog, YO, K1, K2tog, YO, YO, SSK, K1, YO, SSK, K2], K4, [repeat bracket pattern], K4, [repeat bracket pattern], K4

Row 6: K all stitches, but always KTBL on the first stitch of each double YO.

Row 7: K4, [K1, K2tog, YO, K8, YO, SSK, K1], K4, [repeat bracket pattern], K4, [repeat bracket pattern], K4

Row 8: K all stitches

Row 9: K4, [K2tog, YO, K1, K2tog, YO, YO, SSK, K2tog, YO, YO, SSK, K1, YO, SSK], K4, [repeat bracket pattern], K4, [repeat bracket pattern], K4

Row 10: K all stitches, but always KTBL on the first stitch of each double YO.

Row 11: K4, [K2, YO, SSK, K6, K2tog, YO, K2], K4, [repeat bracket pattern], K4, [repeat bracket pattern], K4

Row 12: K all stitches

Row 13: K4, [K3, YO, SSK, K2tog, YO, YO, SSK, K2tog, YO, K3], K4, [repeat bracket pattern], K4, [repeat bracket pattern], K4

Row 14: K all stitches, but always KTBL on the first stitch of each double YO.

Row 15: K4, [K4, YO, SSK, K2, K2tog, YO, K4], K4, [repeat bracket pattern], K4, [repeat bracket pattern], K4

Row 16: K all stitches

Row 17: K4, [K5, YO, SSK, K2tog, YO, K5], K4, [repeat bracket pattern], K4, [repeat bracket pattern], K4

Row 18: K all stitches

Alternate the stripes until you have 11 dropped stitch stripes and 10 Navajo diamond stripes OR until you have a scarf of the desired length.  Always finish the scarf with the end of a dropped stitch scarf.

**Preparation for the bottom fringe, you may skip this if you choose to not include a fringe**

Row 1: *K1, YO, K2tog* rep until last stitch, K1

Row 2: K all stitches

Bind off loosely.

***

THE FRINGE

Create 380 20″ pieces of yarn for the fringe (or try a different size for a shorter/longer fringe).  This can be done easily by wrapping the yarn around a hardcover notebook longways.  Thread 10 pieces of yarn through each hole at the ends of the scarf, trying to keep the ends as even as possible.  The center of each piece of yarn should be in the hole and each fringe should be about 10″ long.  There should be 20 pieces of 10″ fringe per hole/knot.  Tie knots, allowing some space between the end of the scarf and the knots.  Trim any fringe pieces that seem too long.

PALM FRONDS – Shawl

About this pattern: I knit this shawl for my mom as a Christmas present in 2009.  This is a great project for knitters looking to get into lace knitting, since the pattern is simple enough to easily memorize and the results are visually stunning (as most patterns based around feather and fan tend to be).  The combination of large needles and lace weight yarn means that the shawl knits up quite quickly and has a nice airiness to it.

Needles: size 11.

Yarn: Knitpicks Shadow, between 500-600 yards.

Pattern:

Loosely cast on 56 stitches.

Row 1: Knit all stitches.

Row 2: Purl all stitches.

Row 3: K1, *K2TOG x3, (YO, K1) x6, K2TOG x3* repeat between *s to last stitch, K1.

Row 4: Knit all stitches.

Repeat rows 1-4 until the shawl measures approximately 7 feet, bind off loosely.  Block!

ERRATA:

The shawl in the picture actually included an extra repeat of the pattern, meaning you would have to cast on 74 stitches.  I apologize to those who have already started the shawl!  Thank you Liz for pointing this out!

SPIRAL AND EYELET – Kindle 2 Cover

About this pattern: the second Kindle 2 cover I knit for myself (after losing my first Kindle and first cover).  This is a nice design because it has good coverage, but still retains from of the visual interest from lace knitting.

Attention: I did not gauge this pattern.  It is useful to work this with your Kindle 2 handy, so that you can ‘try it on’ as you knit (if you don’t have a Kindle 2, you can look up the dimensions online and create a correctly sized cardboard cut out).  The pattern below reflects my natural gauge – if your cover is too tight or too loose, try removing or adding stitches on the sides of the cover.  As you are knitting, the cover will always look too small – it’s what keeps it snug.

Needles: size 3 circulars, at least 30” long for Magic Loop or double pointed needles.

Yarn: Sublime Soya Cotton DK, between 80-100 yards.

Pattern:

Loosely cast on 64 stitches, pattern is worked in the round.  Work in k1, p1 rib until the work measures about half an inch.  Begin lace stitch.

Row 1: k1, p3, k3, k2tog, k4, yo, p2, yo, k2tog, p2, yo, k4, sl1, k1, psso, k3, p3, k1.
Row 2 (and every even row): k1, p3, k9, p2, k2, p2, k9, p3, k1.
Row 3: k1, p3, k2, k2tog, k4, yo, k1, p2, k2tog, yo, p2, k1, yo, k4, sl1, k1, psso, k2, p3, k1.
Row 4: same as Row 2.
Row 5: k1, p3, k1, k2tog, k4, yo, k2, p2, yo, k2tog, p2, k2, yo, k4, sl1, k1, psso, k1, p3, k1.
Row 6: same as Row 2.
Row 7: k1, p3, k2tog, k4, yo, k3, p2, k2tog, yo, p2, k3, yo, k4, sl1, k1, psso, p3, k1.
Row 8: same as Row 2.

Repeat all rows until the Kindle 2 is completely covered.  Bind off using Kitchener’s stitch.

ERRATA: Row 3 should begin with k1, p3. Thanks Pam!